Blank Templates for Documentary & Video Production:
- A-Roll Questionnaire for Doc & Video – Blank Template
- Script for Doc & Video – Blank Template
- Shotlist & Schedule for Doc & Video – Blank Template
Select past Etherium Sky projects with reference pre-production paperwork:
(Republic of Molossia Minidoc)
Pre-Production Paperwork:
Key Links:
Pre-Production Paperwork:
Key Links:
Connect with Etherium Sky!
Building Your Shotlist & Schedule
By now you should have A-roll questions list as well as your documentary script all ready. If you don’t – you might want to get those done first. But there is one more pre-pro document we need to get done before you’re ready for your shoot. In fact it’s more like two variations of one document – your Shotlist and Schedule.
QUICK SUMMARY
Guess what – your shotlist is already largely done! Look at the B-roll or visuals column of your script. Pull it into a clean, separate document and there you have it! Then, to build your schedule, re-organize your shotlist from story order into the order in which you can most efficiently film it and add the times for each shot.
And there’s your quick answer! But if you really want to impress your client, make your shoot go smoother and make your crew’s lives easier – read on and I’ll dive deeper into the whole process.
DO YOU REALLY NEED A SHOTLIST?
Over my 16 years in the film & tv industry, I can tell you from experience – being on shoots without a clear shot list and/or schedule tends to be a nightmare for everyone involved. You producers wont trust you – and rightfully so. Your actors or interviewees and crew – will grow angry from chaos. You yourself will feel overly pressured to make difficult decisions on the spot – and without this prior planning, you’re far more likely to make decisions which will be very wrong.
Many directors have a different approach, but even if you are one of those spontaneous creatives who prefer to improvise rather than plan – I can promise you that having a clear shotlist and schedule will in fact allow you more space for improvisation and creativity than not having one. That’s because it’ll help your team support you more effectively in your vision, it’s because it’ll allow you yourself to more clearly see how each decision you make on set affects the bigger picture and it’s because in the stress of the shoot day, you will always know that at the end of the day, you will have a finished product no matter what, because you’ve done your prep work. This in turn lets you focus on creativity, rather than trying to figure out if certain shots or sequences would actually work when cut together or not.
ALL RIGHT, LET’S DO IT!
For your shotlist you can use my template file (links above), or simply create a chart in a word document – something similar to mine. At the same time, open up your script file, because as I mentioned before – your shotlist is actually, at least for the most part – done.
Now, what you wanna do is go through your Visuals or B-roll column in your script and copy all that over to your shotlist. You won’t just dump it all in there in a big pile though.
The list you will copy from your script is likely to be your list of key ‘scenes’ or key ‘sequences’ – and we will still need to break those down into specific shots. But there’s one more important point. You are not only copying over your visuals section. In fact – be absolutely sure you don’t forget your A-roll in your shotlist! Without it – you have no story and you have no project! In fact – for me A-roll interviews are the first thing I usually put into my shotlist.
So – let’s say that from my script, first key things I copy into my shotlist is my A-roll interview. Let’s say I plan for this to be a traditional sit down interview. Now, let’s figure out the shots I need to shoot for this sequence. I want a Static Medium Close Up shot. That’s one of my shots. But I also want to have that interview in a Wide dutch angle shot, with dolly motion. That’s another shot. And while they’re still seated – I also want to film a Hero Shot of the speaker. (If you don’t know what a HERO SHOT is, don’t worry, I’ll get back to that a bit later.) But in this example the hero shot would be my third shot. And there – first sequence done! Now I know that my first sequence is a sit down interview and to complete it, I need to capture those 3 shots.
Moving on – let’s say for another scene, I need to establish where we are. Our setting is the Republic of Molossia. I know I’ll need a set of aerial shots for this sequence. A set of shots covering one key point of focus would be called a SERIES. This is a term from narrative film and I’m a narrative filmmaker first so that’s what I call it. This aerial shot SERIES showing my setting – the republic of Molossia – now becomes my first shot of this sequence. But that alone is not enough. I also want to film a welcome sign – that’s my second shot of the sequence and I’ll also shoot this sign as a SERIES, to have more options in post production. As such I can capture a static close up, a wider shot, and I can film a tourist pointing to the sign – there, I captured the shot in a series. For my third shot for this sequence I want to film the border marker between US and Molossia. And so on.
In this way, I go through my entire shotlist, sequence by sequence, and I break each of them down into individual shots I want to capture for each of those sequences. On some shoots, when I have more time, budget and space for creativity – my shotlists end up being quite technical. On quick, small, one-man-crew shoots like Molossia, especially when I haven’t had a chance to pre-scout the locations, my shotlists sometimes resemble a “shopping list” of key items I want to film instead.
I’ll be honest that on a lot of my mini-doc nowadays, I don’t go into great amount of detail. That’s because I’ve shot hundreds of such projects by now and I tend to be able to do a good amount of that work in my head. Especially if working alone or merely with an assistant – I simply have no need to outline for myself every single tiny detail of every shot. However that changes greatly when I work on bigger projects, when I work for new and/or unfamiliar clients, or when I work with a larger crew. At those times, it becomes absolutely crucial that I break down my project as completely and precisely as possible. In such cases, it’s not unusual for my production paperwork and also my shotlist – to be a thick book rather than a couple pages. Also – if you’re a beginner, I can’t stress this enough:
Pre-production is by far the most important part of making any film, tv or video project. The more detail you go into early on – the better your end product will end up. Period.
All right, so you’ve gone through your visuals, you broke them down into sequences, you’ve included your a-roll as its own sequence/s and you’ve listed all the key shots you need to capture for each of your sequences. Great! All that’s really left is just some fine tuning.
LET’S FINE TUNE THEN!
This will differ from project to project, from story to story, but go through your shotlist and ask yourself – “Is anything missing? Is there anything else that might be helpful in my edit?” Here are some points to consider:
- Did you plan enough sequences or shots to properly establish your setting? This could be your geographic location, or the building you are in, or the time period. This is especially important if your setting plays a role in your story! In a story like Molossia – the setting was my whole story.
- Did you plan enough sequences or shots to establish each of your key speakers? And is all your planned really relevant to your story? Consider this: Maybe you’re shooting a very personal story and you have planned a lot of shots showing me your subject – but what if all you planned shows me your speaker in their professional setting, engaged at work. What will you show me when they talk about their family? About their childhood? About their hobbies? You can have 5 hours of footage showing this person at work – only to realize that you still have no material at all that fits your story. But what if your speaker is only giving you very limited time? Well, maybe you need to add another sequence – showing his morning routine at home. He has to get to work somehow, and if you join him for the ride – you get to film him listening to the radio and singing along, speaking to his mother on the phone while in traffic, etc – all of which could be valuable to make this character more relatable and the story – more personal. Well, I hope you get the idea.
- Will you need and did you plan enough cutaway shots, transition & time passage shots? (or sequences) We don’t need to be looking at your character for the whole runtime of your story. Maybe we need to capture birds flying over his head or the flowers growing in his garden. Those can help you establish your setting, but on a technical end, can also help you cover jump cuts in your interview as you edit. And what about transitions between your different sequences? How will you show time passage? These shots might not be the most memorable, they might not be key to your story, but they might be a valuable transition to place between different sequences.
So, using some of those points of consideration – fill in any potential blanks you may still have and there you have it – your documentary or video shotlist is done!
There’s just one last pre-pro document we need to create – the schedule. For small projects, this ends up being mostly just a rearranged variation of your shotlist. And once you’re experienced, at least for smaller projects, you’ll in fact combine the two into one thing. So, let’s get this done!
WATCH ME WORK!
You’ve worked hard enough. Now you get to watch me work.
I’m doing my pre-pro for an upcoming project and will narrate my whole process for you!
(VIDEO RELEASING VERY SOON! DO CHECK BACK)
THE SCHEDULE
Here’s the deal. We already have nearly all the info we need in your shotlist – now we just need to rearrange it into the most efficient shooting order. Here are some factors to consider as you do that:
- The availability of your talent.
Maybe your interviewee is available only for 2 hours. You better plan to make best use of that time then! - The availability of locations.
Same thing. If the location has to close by afternoon, you better get your stuff done in time. - Any permit restrictions.
You might have permissions to shoot certain things only on a certain date or within a specific time. - Weather conditions.
If you gotta shoot outdoors and you expect rain in the afternoon, better get the outdoor shots done early! - Time of day and sunlight.
Let’s say you pre-scouted the location weeks before, only to get there, set up for your interview and realize you’re shooting right against the son and all you’re seeing is a silhouette of your interviewee. Bummer. Could’ve been avoided with better planning. And now you’re losing sunlight and gotta on the spot change your entire plan for the sequence. - Energy levels – your, your speakers’ and your crew’s.
If you have a 15hr shoot, and plan your most important shots as the very last thing – the energy is likely to be down. - Think of the most efficient schedule order.
Maybe you have 3 sequences all within one location before you move an hour away. Schedule them back to back. Similarly, If you have only two sequences for which you need to show your speaker on camera – try to schedule them back to back, before you move on to other shots, during which they’d merely have to wait. What about your batteries? Do you have equipment that might need to be charged halfway through the day? Plan for that!
As I plan my shooting order, I also put down for myself times of day for each shot or sequence. This then gives me an hourly breakdown, of what I’ll be doing step by step. Along with my workload itself, I also add some other items to my schedule, whenever relevant – things such as the drive between locations, a lunch break, any extended camera sets ups and so on.
And… your shotlist and schedule should now be complete! Congrats! Before you take off though – here are a few bonus tips!
BONUS TIP #1
HERO SHOTS
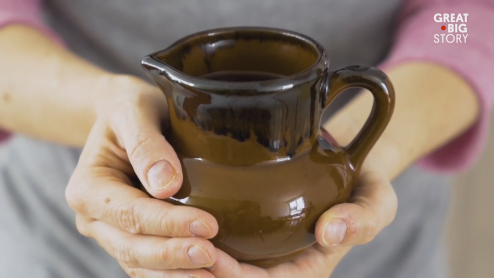
Even though I’ve used hero shots for ages I honestly never heard this term until just the recent years. I might be wrong, but I think this is a term that came into common use sometime within the last decade of social media video, and most specifically – I associate it with GreatBigStory mini-docs. All the GreatBigStory projects made heavy use of hero shots.
A hero shot is a shot focusing on the “hero” or the key subject of your story (duh!). Usually this shot would be more dramatic, more visual, more pre-staged, well lit. It can help you clearly establish your subject, in all his/her/its glory, it can serve as a strong central image you open or close your story with, it can be a good shot to place your title over! Have a look at my Molossia Minidoc – can you find my hero shots?
But – in documentary and video production – you hero doesn’t even need to be a person! Think of a commercial for a laundry detergent – what’s the last image you see? Probably a nicely lit, glorious looking box of detergent. There’s your hero shot!
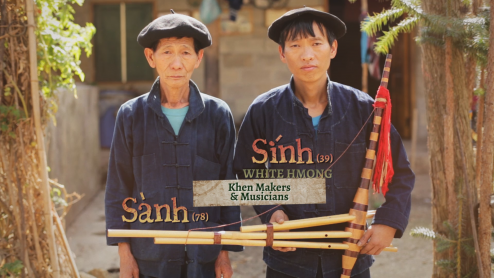
Several years ago I did indeed work with GreatBigStory on a project about Coffee Around the World. The entire project was built almost entirely around Hero shots. We had hero shots of speakers, hero shots of locations and most importantly – hero shots of coffee!
BONUS TIP #2
PLAN 3~5 SHOTS FOR EACH SEQUENCE + SHOOT SERIES!
This is as much a tip for your shotlist as it is a tip for your shoot. For each sequence, you generally want to have at least three shots. Why three? This goes back to traditional story structure. Having those three options lets you creatively build progression in your edit, with a beginning, middle and end. It works well with 5 or 7 as well.
Similarly – for each key “subject” you film – whenever possible, film it as a series! This will give you much more options in post production, it’ll allow you to make a more dynamic, more engaging edit, and in a crunch when you don’t have enough material for your edit, it can save your butt.
BONUS TIP #3
FILM YOUR A-ROLL FIRST!
Whenever possible, plan and film your A-roll interviews first! Here’s the rationale: A-roll is your key story. If you only capture your a-roll and everything else goes to hell halfway through the day for some reason you can’t control – you will still have your story. But if you leave your A-roll till the end and something happens and you can’t get it – well, then all you’ve got are a bunch of pretty looking pictures but no story to tie them together with.
WRAP UP
And that’s it! If you followed my tutorials, you should now have your A-Roll questionnaire/s, your script and your shotlist & schedule. Congrats on completing all your pre-production paperwork!
But this doesn’t have to be a goodbye! In fact – please join our Etherium Sky crew and a community of filmmakers on our discord or on facebook! We’d love to see your completed pre-pro paperwork, we’d be happy to offer feedback and answer any questions – and by sharing your work, you’d be helping others improve their skills!
Thanks a lot and hope to see you there!
